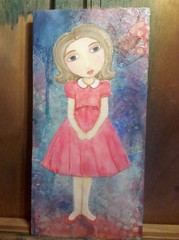
Petit Doll project pt. 1


doll on board1
Originally uploaded by saunjune

1st phase of my suzi petite doll project...got my drawing on a painted and collaged backboard. The summer has flown by so quickly, the kids just started back to school and I have a tiny bit of free time on my hands. I enrolled in this class at the end of May, and have had no real time to work on any of it since the kids got out of school in early June. I took my sketchbook w/ me and made several drawings while traveling, (and boy did we do some traveling this summer), there was just never enough time to get to the painting portion of class. I realized as the kids went back to school this class only has one more week of open participation left, so I thought I'd better get to work and get something done! So far so good. :)

Comments

Popular posts from this blog

Stamping Solutions Page Layout

This page was made using the Cricut Expression and the Stamping Solutions cartridge.  Click here for a PDF of the directions we used in class!  Enjoy!

Sweet Birdie Borderless Shaker Card

W e are shaking it up for the month of May with  this sweet little birdie card!  Create a borderless shaker card featuring Marlene's Sweet Birdie stamps and a beautifully blended Oxide ink background! This is a fun and different way to create a shaker card that doesn't require the use of dimensional foam tape. There are links to the video tutorial and PDF instructions below. Hope you enjoy making this sweet birdie card yourself! Supplies Used: Cardstock and Acetate Sweet Birdie by Marlene stamp set Sentimental Flowers by Simon Hurley Stamp set Black Archival ink Oxide inks in: Picked Raspberry, Spun Sugar, Speckled Egg, Stormy Sky, Chipped Sapphire Domed Foam Ink Blenders Assorted Water Based Markers Water Brush Scrappy Tape Bone Folder Tape Runner Scissors Faber-Castell Metallic Highlighters PDF Tutorial  Here